Securing Your Data With Local AI Model Execution: A Guide Using Hugging Face
Hugging Face facilitates local AI model execution with pre-trained models, boosting privacy and efficiency while maintaining optimal performance.
Rewanth Tammana is a security ninja, open-source contributor, and a full-time freelancer. Previously, Senior Security Architect at Emirates NBD (National Bank of Dubai). He is passionate about DevSecOps, Cloud, and Container Security. He added 17,000+ lines of code to Nmap (famous as Swiss Army knife of network utilities). Holds industry certifications like CKS (Certified Kubernetes Security Specialist), CKA (Certified Kubernetes Administrator), etc.
Rewanth speaks and delivers training at international security conferences worldwide including Black Hat, Defcon, Hack In The Box (Dubai and Amsterdam), CRESTCon UK, PHDays, Nullcon, Bsides, CISO Platform, null chapters and multiple others.
He was recognized as one of the MVP researchers on Bugcrowd (2018) and identified vulnerabilities in several organizations. He also published an IEEE research paper on an offensive attack in Machine Learning and Security. He was also a part of the renowned Google Summer of Code program.
In the ever-evolving landscape of artificial intelligence (AI), the potential for data breaches and leaks has become an alarming concern. Recent incidents involving AI tools like OpenAI's ChatGPT have sparked debates over data privacy and security. These tools, while powerful, can inadvertently lead to the exposure of sensitive data if not used judiciously. For example, Samsung Electronics experienced a data leak when employees used ChatGPT to optimize their workflow, inadvertently causing confidential data to enter the chatbot's database.
Similarly, Apple and other major companies have restricted the use of AI tools due to fears of confidential information being leaked or collected. As AI continues to permeate various sectors, it's crucial to prioritize data security and privacy.
One effective strategy to balance these needs is running AI models locally, which is the central focus of this guide. But wait, training models locally require high computational power, resources & expertise. This guide explores how to run pre-trained models from Hugging Face on local systems without incurring massive costs.
The Power of Local AI: Getting Started
Let's start with something simple, like generating images from a given text.
I loved this research paper on Classifier Free Diffusion Guidance from Jonathan Ho. Although the proposed theory sounds promising, reproducing it can be challenging. I'm not interested in spending huge money for an experiment or sheer curiosity.
With the enormous sources and data on the internet, I started exploring to find an existing model to run on a local system.
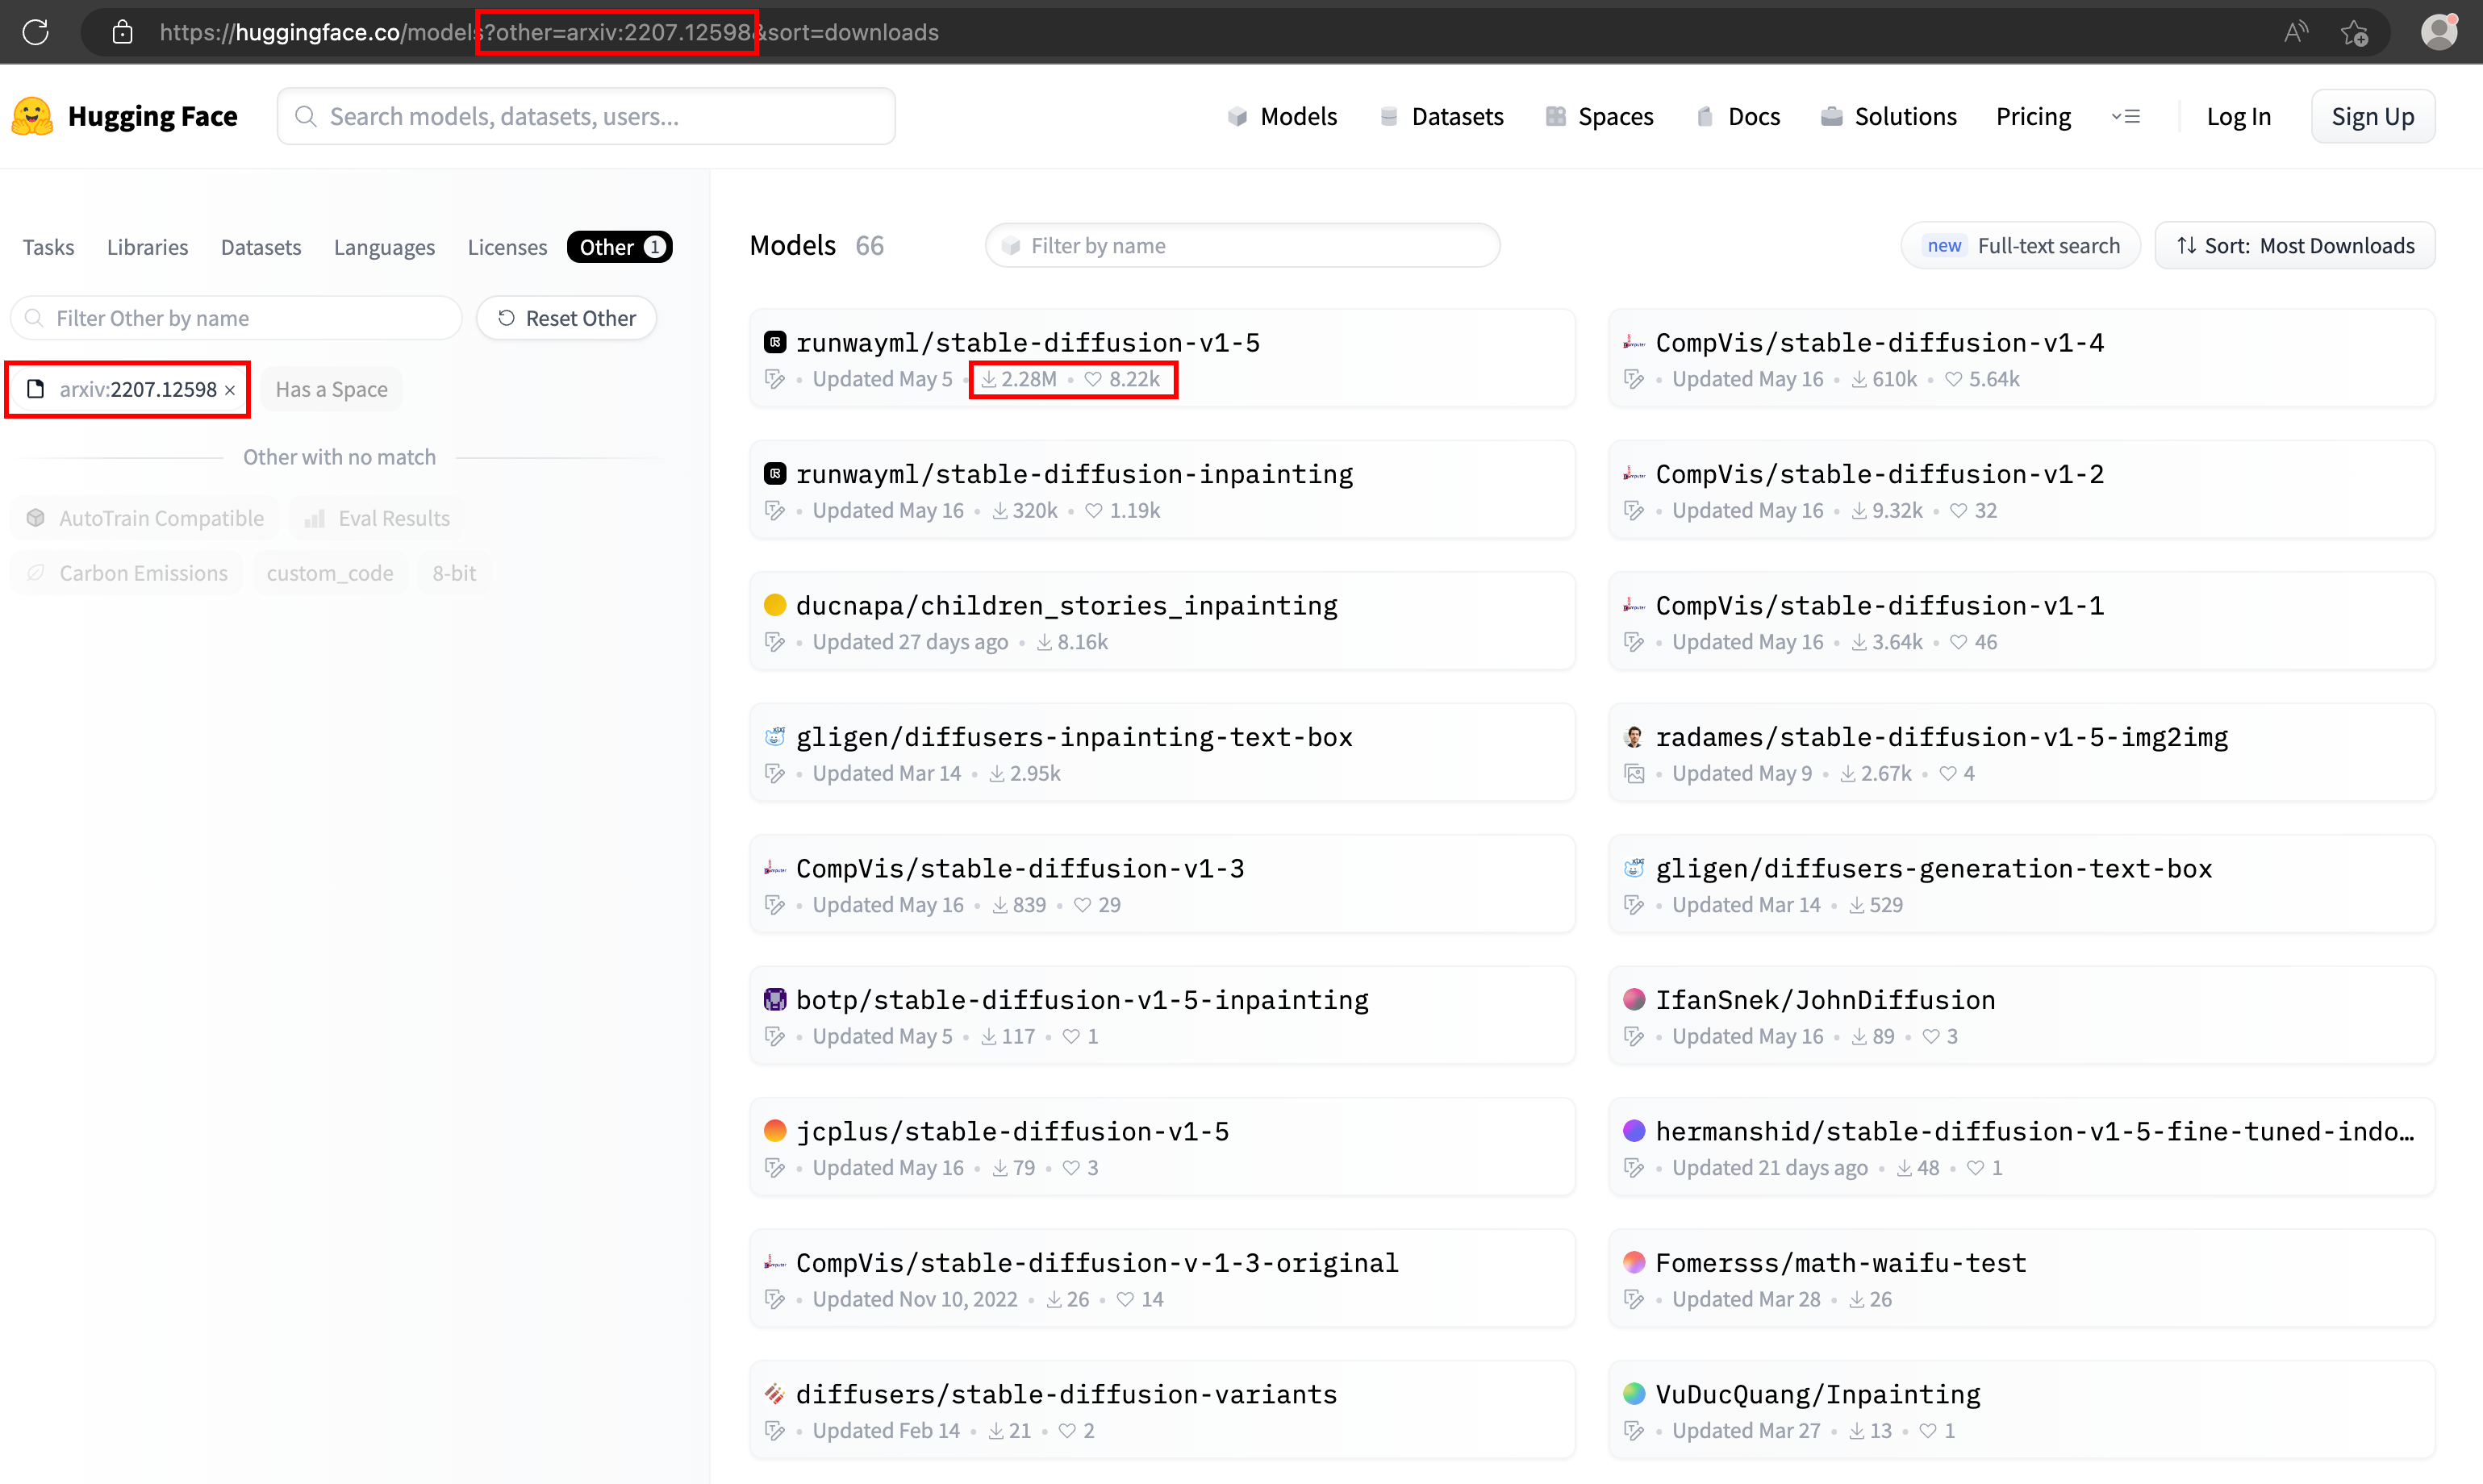
Navigating many resources, I stumbled across Hugging Face, an AI model hub with over 231,836 models (as of this writing) and a vibrant, active community.
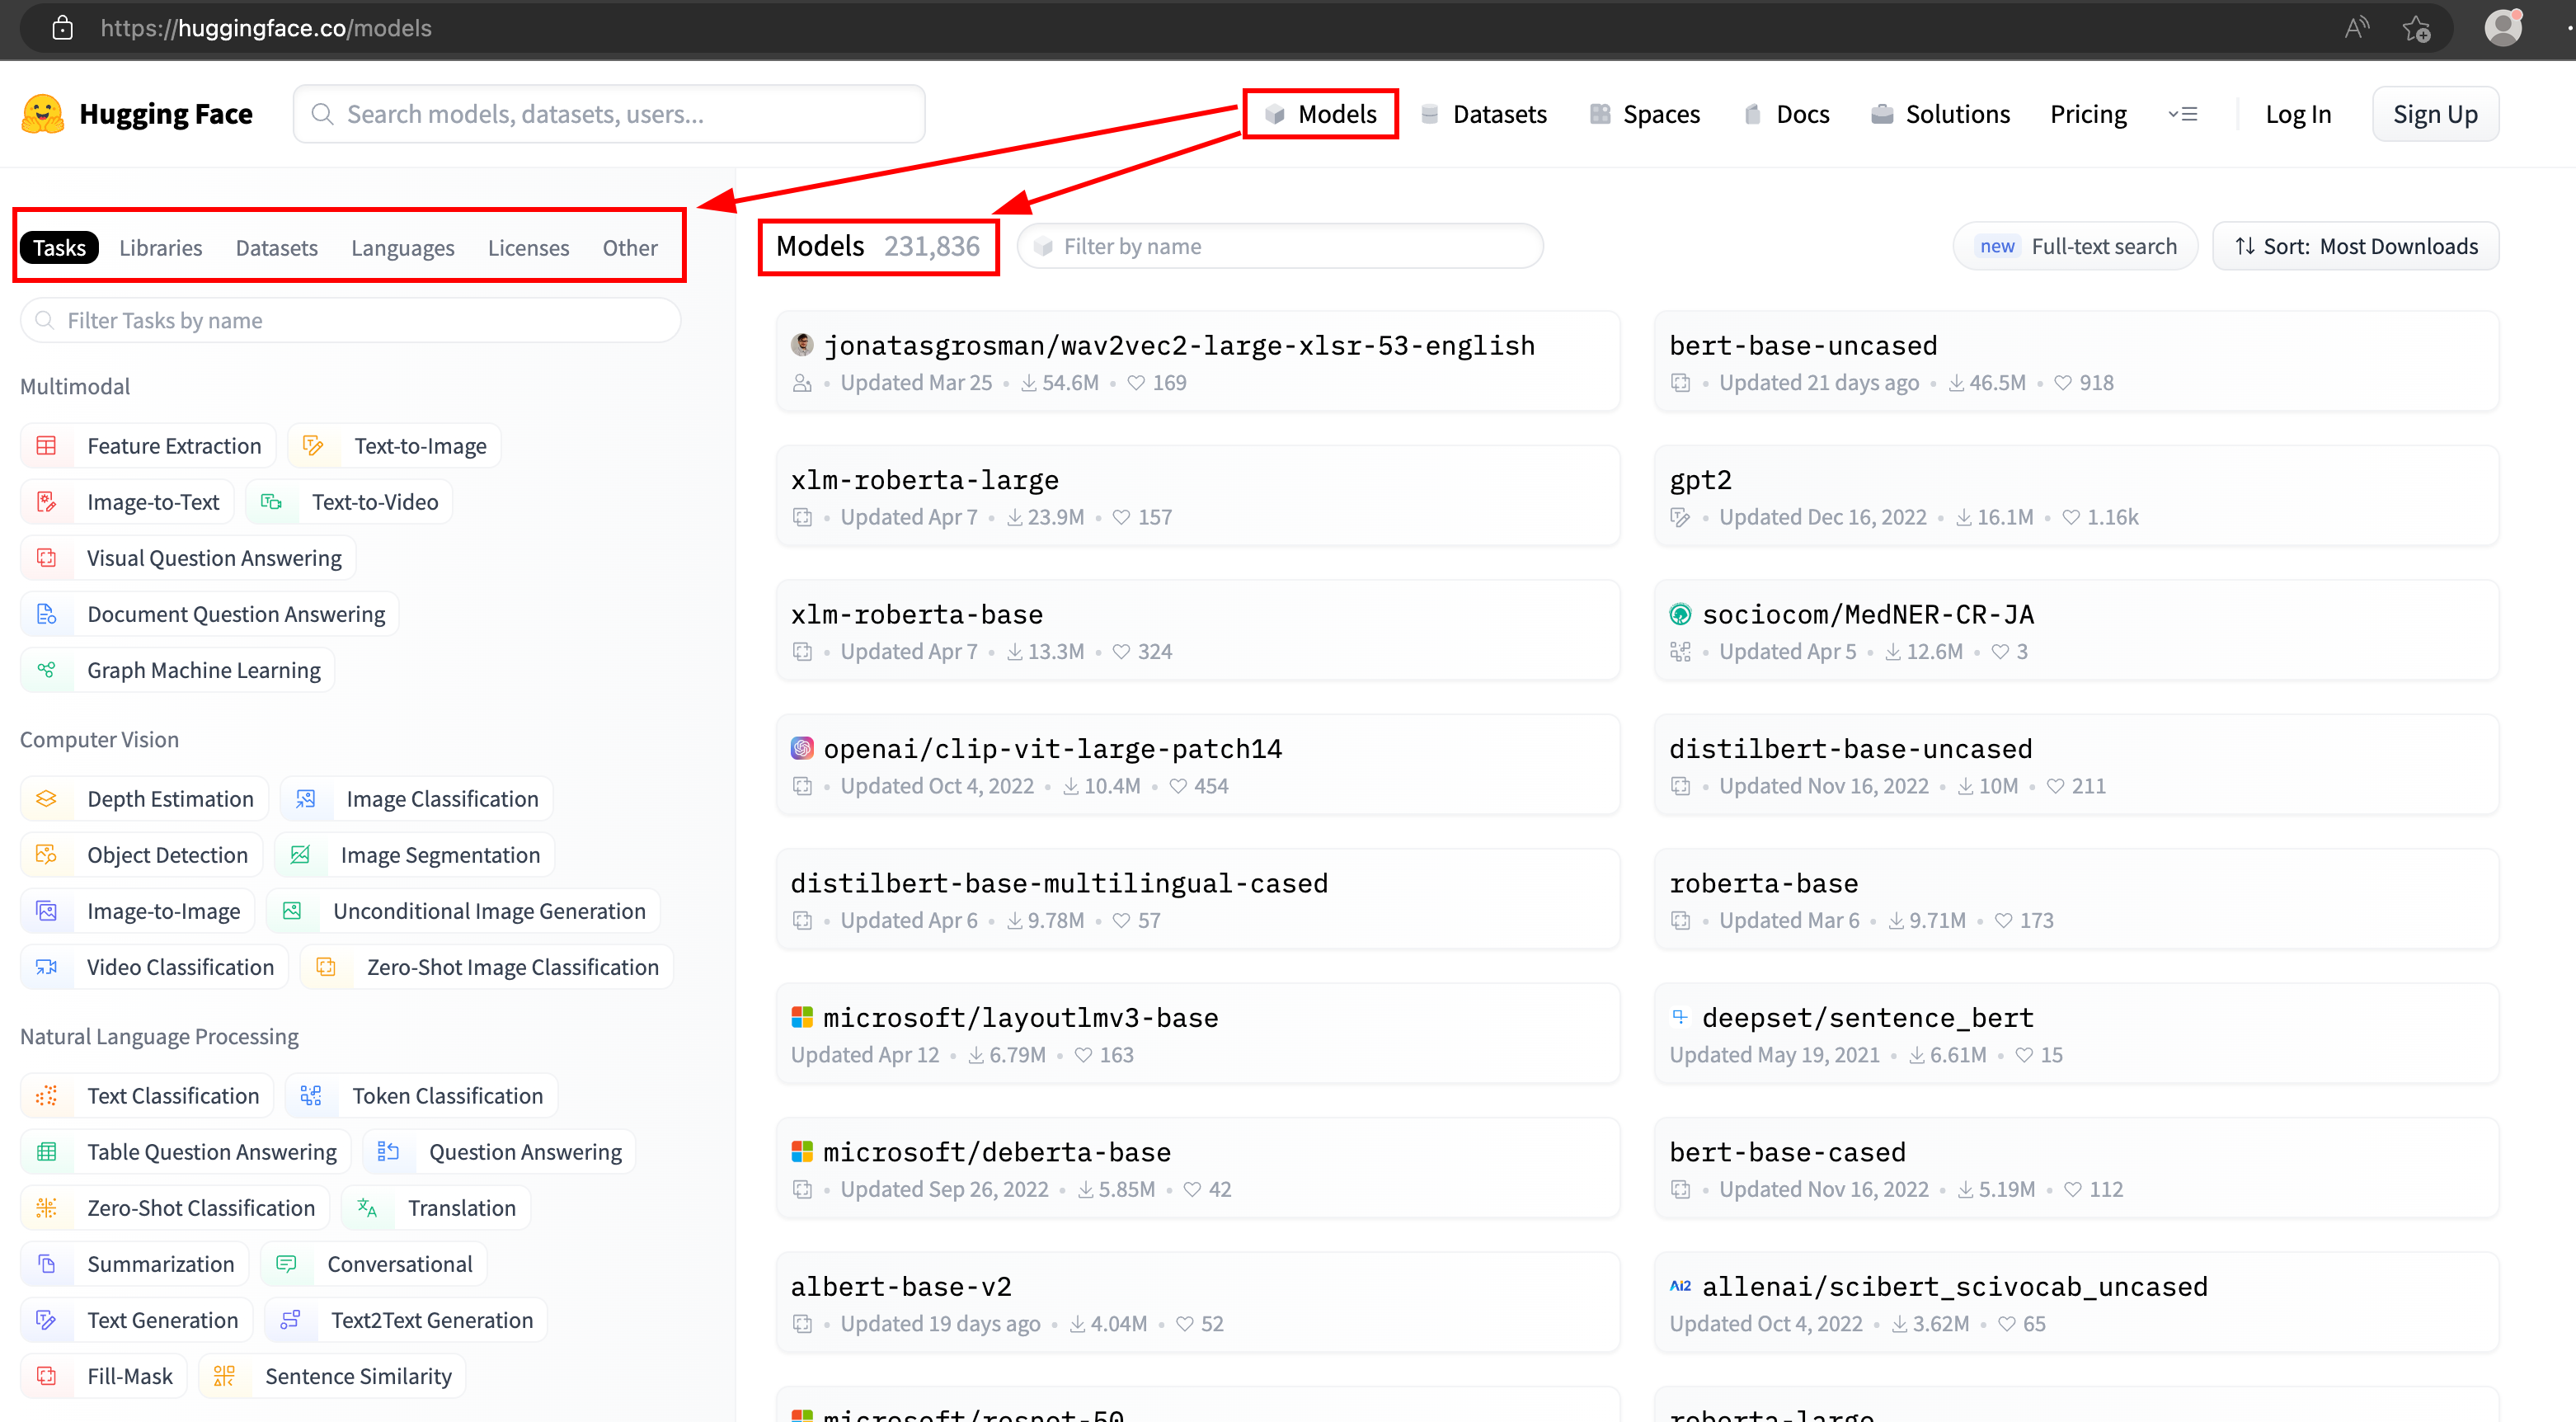
Using Hugging Face's robust search features, you can quickly locate models based on research paper citations. As a result, you can find a model built based on Jonathan Ho's research, ready for local execution. The above research paper, Classifier Free Diffusion Guidance, is cited as arXiv:2207.12598. Many models are built based on this research paper, but I don't know which one to pick. As a regular user, I liked the one with the highest rating.
Hands-On Guide to Local AI Execution
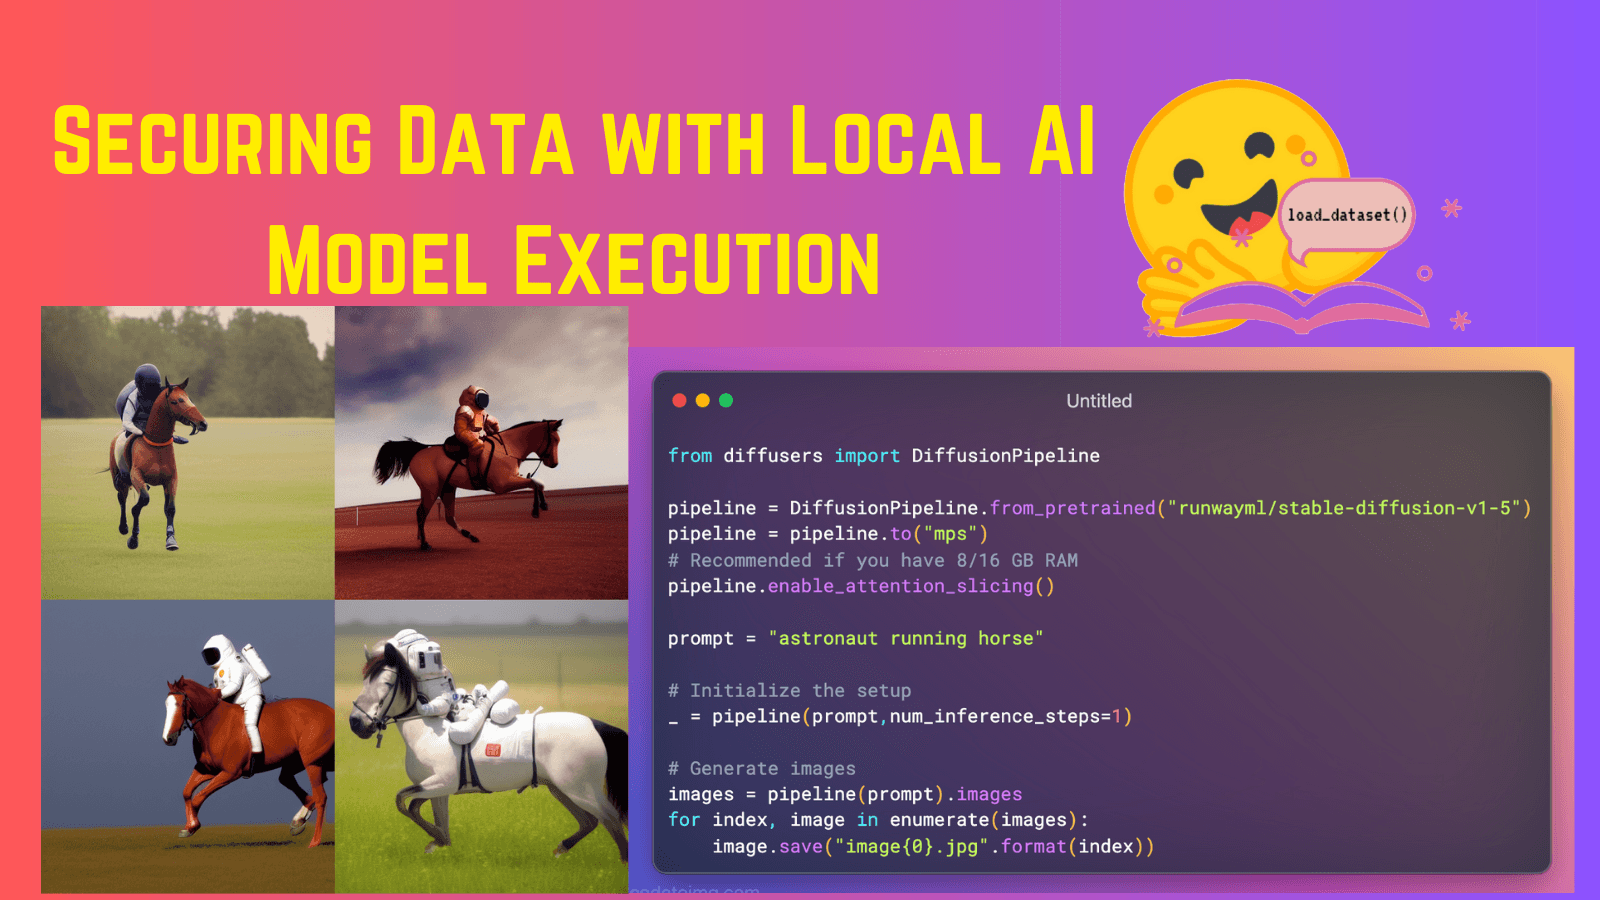
Let's look at how you can use this model for image generation. The following Python script shows how to set up a stable diffusion pipeline and generate images locally using the pre-compiled model, runwayml/stable-diffusion-v1-5.
I'm on an M1 laptop & it supports mps device type at runtime. Use whatever is supported on your system.
from diffusers import DiffusionPipeline

pipeline = DiffusionPipeline.from_pretrained("runwayml/stable-diffusion-v1-5")
pipeline = pipeline.to("mps") # cpu, cuda, mkldnn, opengl, opencl, ideep, hip, ve, fpga, ort, xla, lazy, vulkan, mps, meta, hpu, mtia, privateuseone

# Recommended if you have 8/16 GB RAM
pipeline.enable_attention_slicing()

prompt = "a photo of an astronaut riding a horse on mars"

# Initialize the setup
_ = pipeline(prompt,num_inference_steps=1)

# Generate images
images = pipeline(prompt).images
for index, image in enumerate(images):
    image.save("image{0}.jpg".format(index))
The generated image is as follows:

Unleashing the power of Stable Diffusion Web UI
To make this process even more accessible and customizable, let's leverage Stable Diffusion Web UI. This user-friendly interface allows you to adjust numerous parameters effortlessly. Here are step-by-step instructions on setting up and using the UI:
Clone stable diffusion repository
 git clone https://github.com/AUTOMATIC1111/stable-diffusion-webui.git
 cd stable-diffusion-webui
Start a virtual environment to ensure we aren't messing with other packages.
 python3 -m virtualenv --python="$(command -v python3)" .env
 source .env/bin/activate
Install required packages
 pip install transformers==4.19.2 diffusers invisible-watermark
 pip install -r requirements.txt
On the model page, you can see the "files and versions" section that contains different pre-compiled files for this specific model.
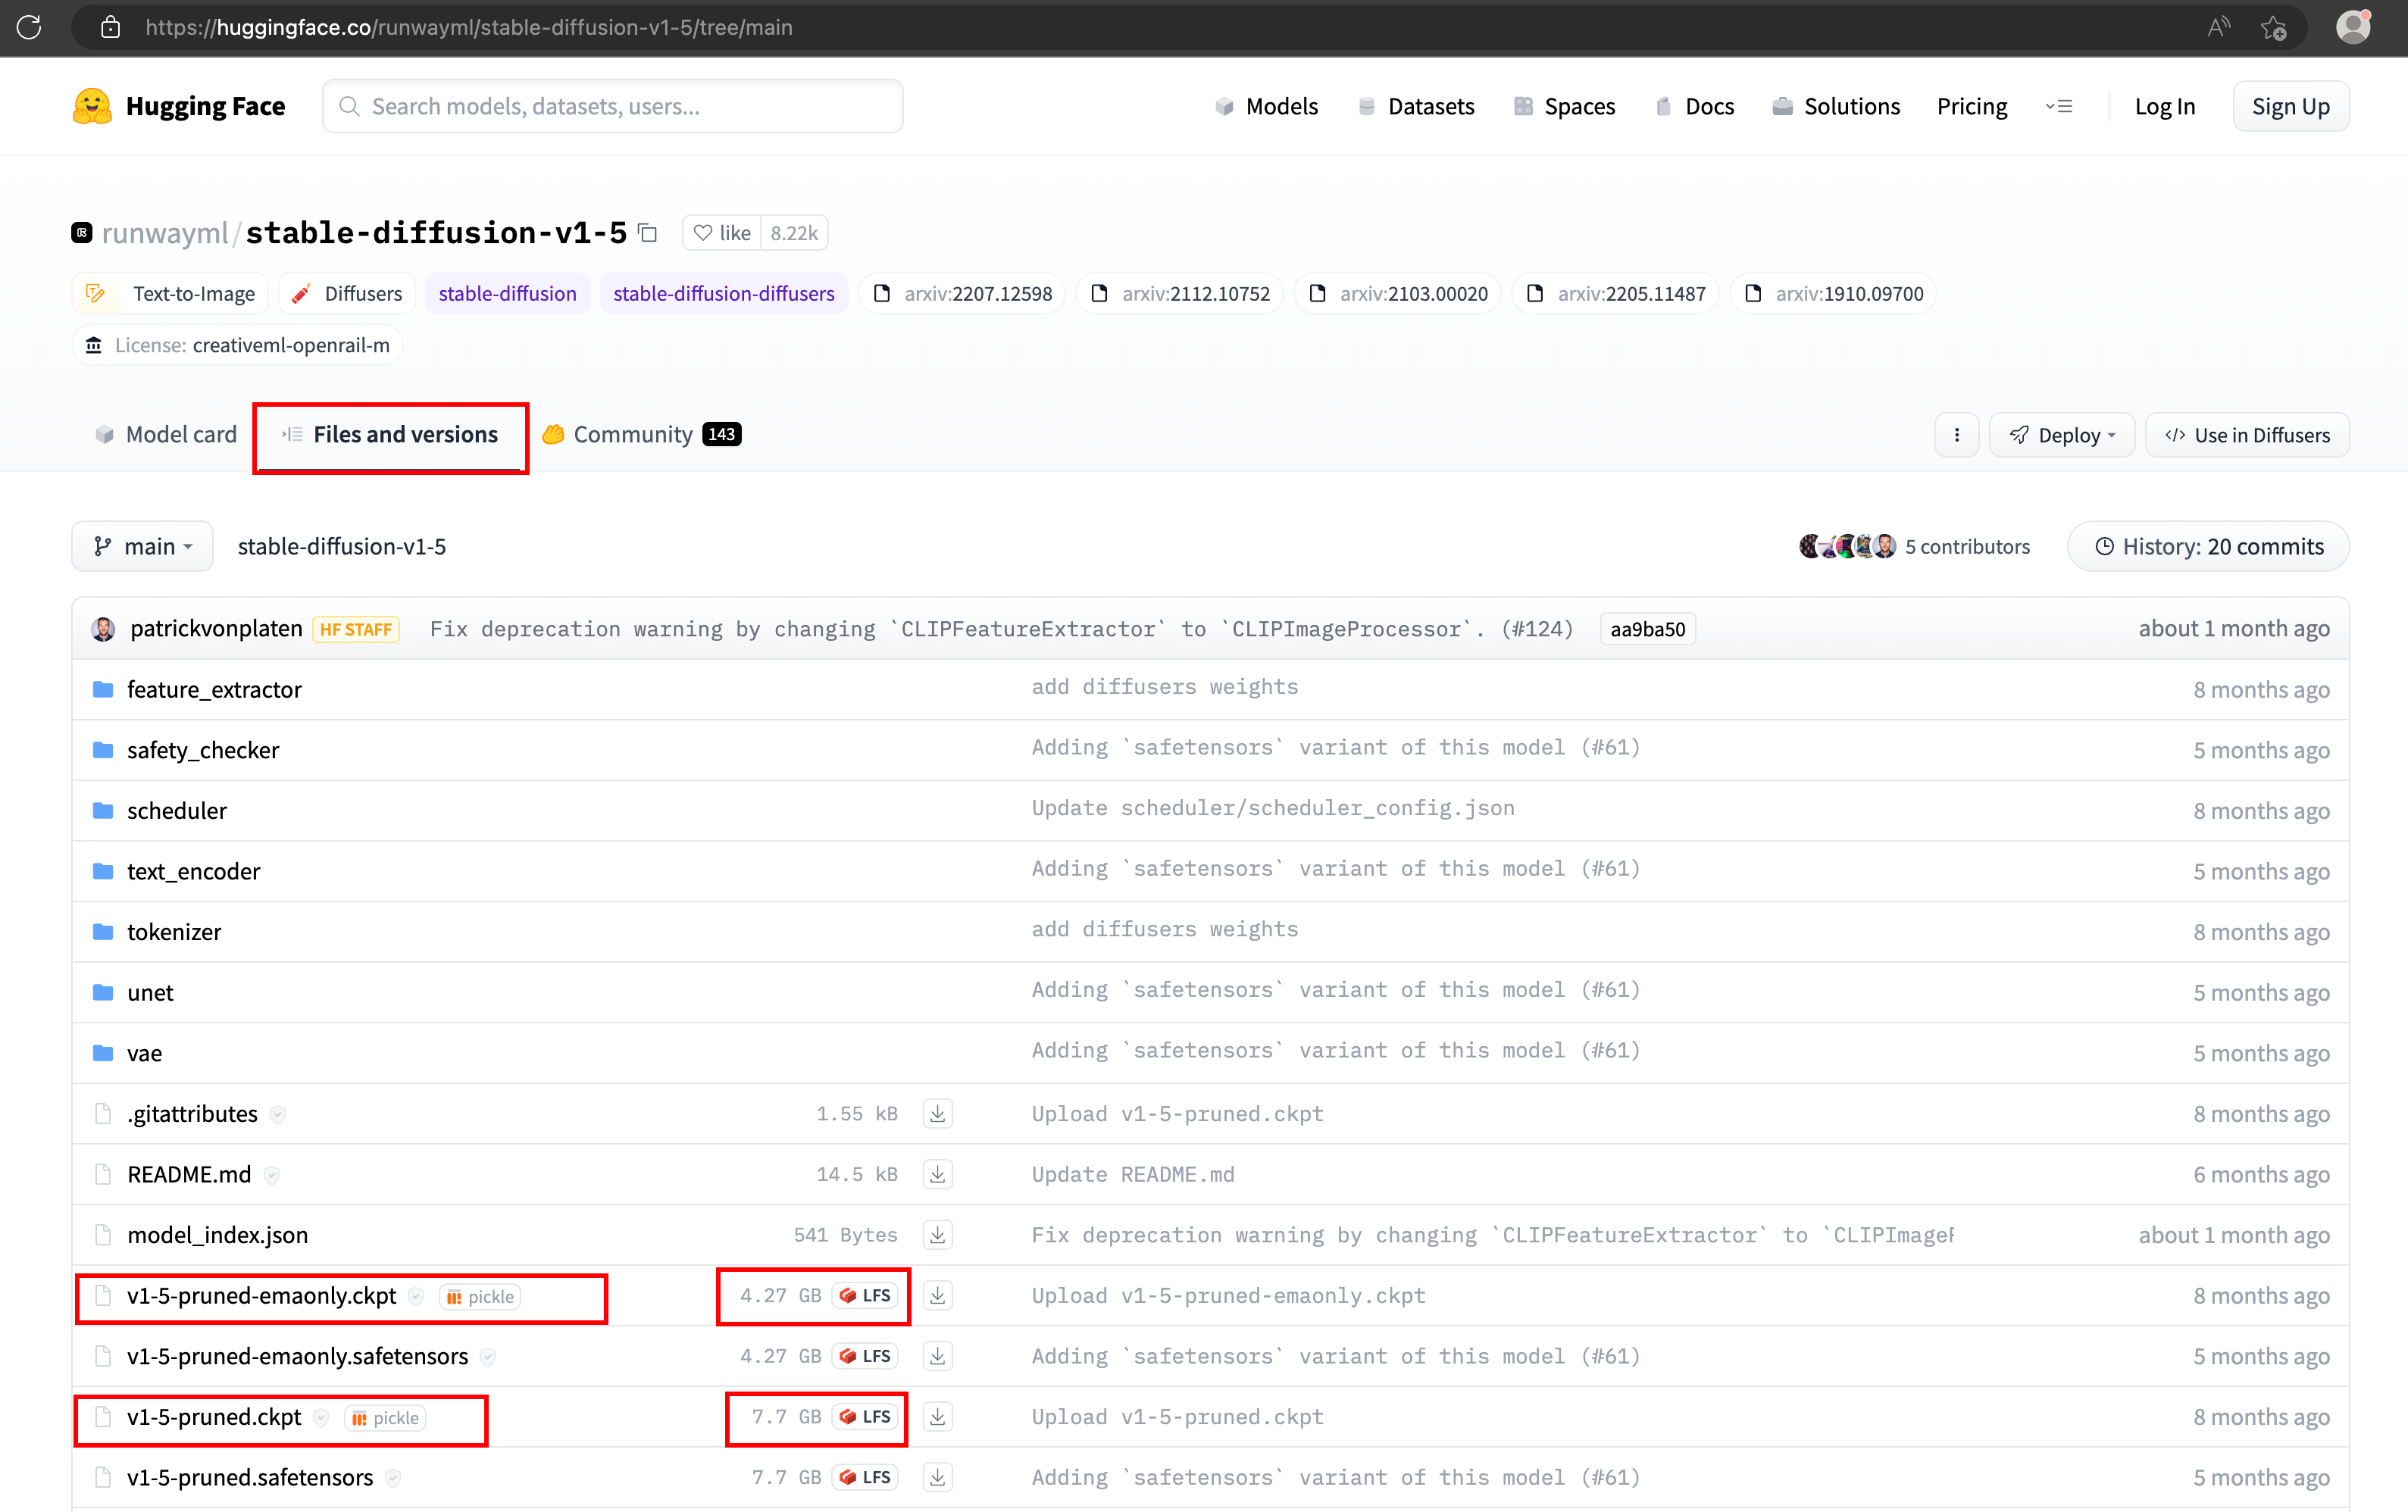
I've downloaded both models seen in the screenshot above. To get started, download the
v1-5-pruned-emaonlycompiled model, as it's smaller. The files are with theckptextension; it's a checkpoint file (likely compiled by Pytorch)cd models/Stable-diffusion wget https://huggingface.co/runwayml/stable-diffusion-v1-5/resolve/main/v1-5-pruned-emaonly.ckptThe WebUI provides a script to start a quick instance on a local port. It checks & installs missing packages, if any.

There is so much information in the output & finally, it runs on a local port,
7860.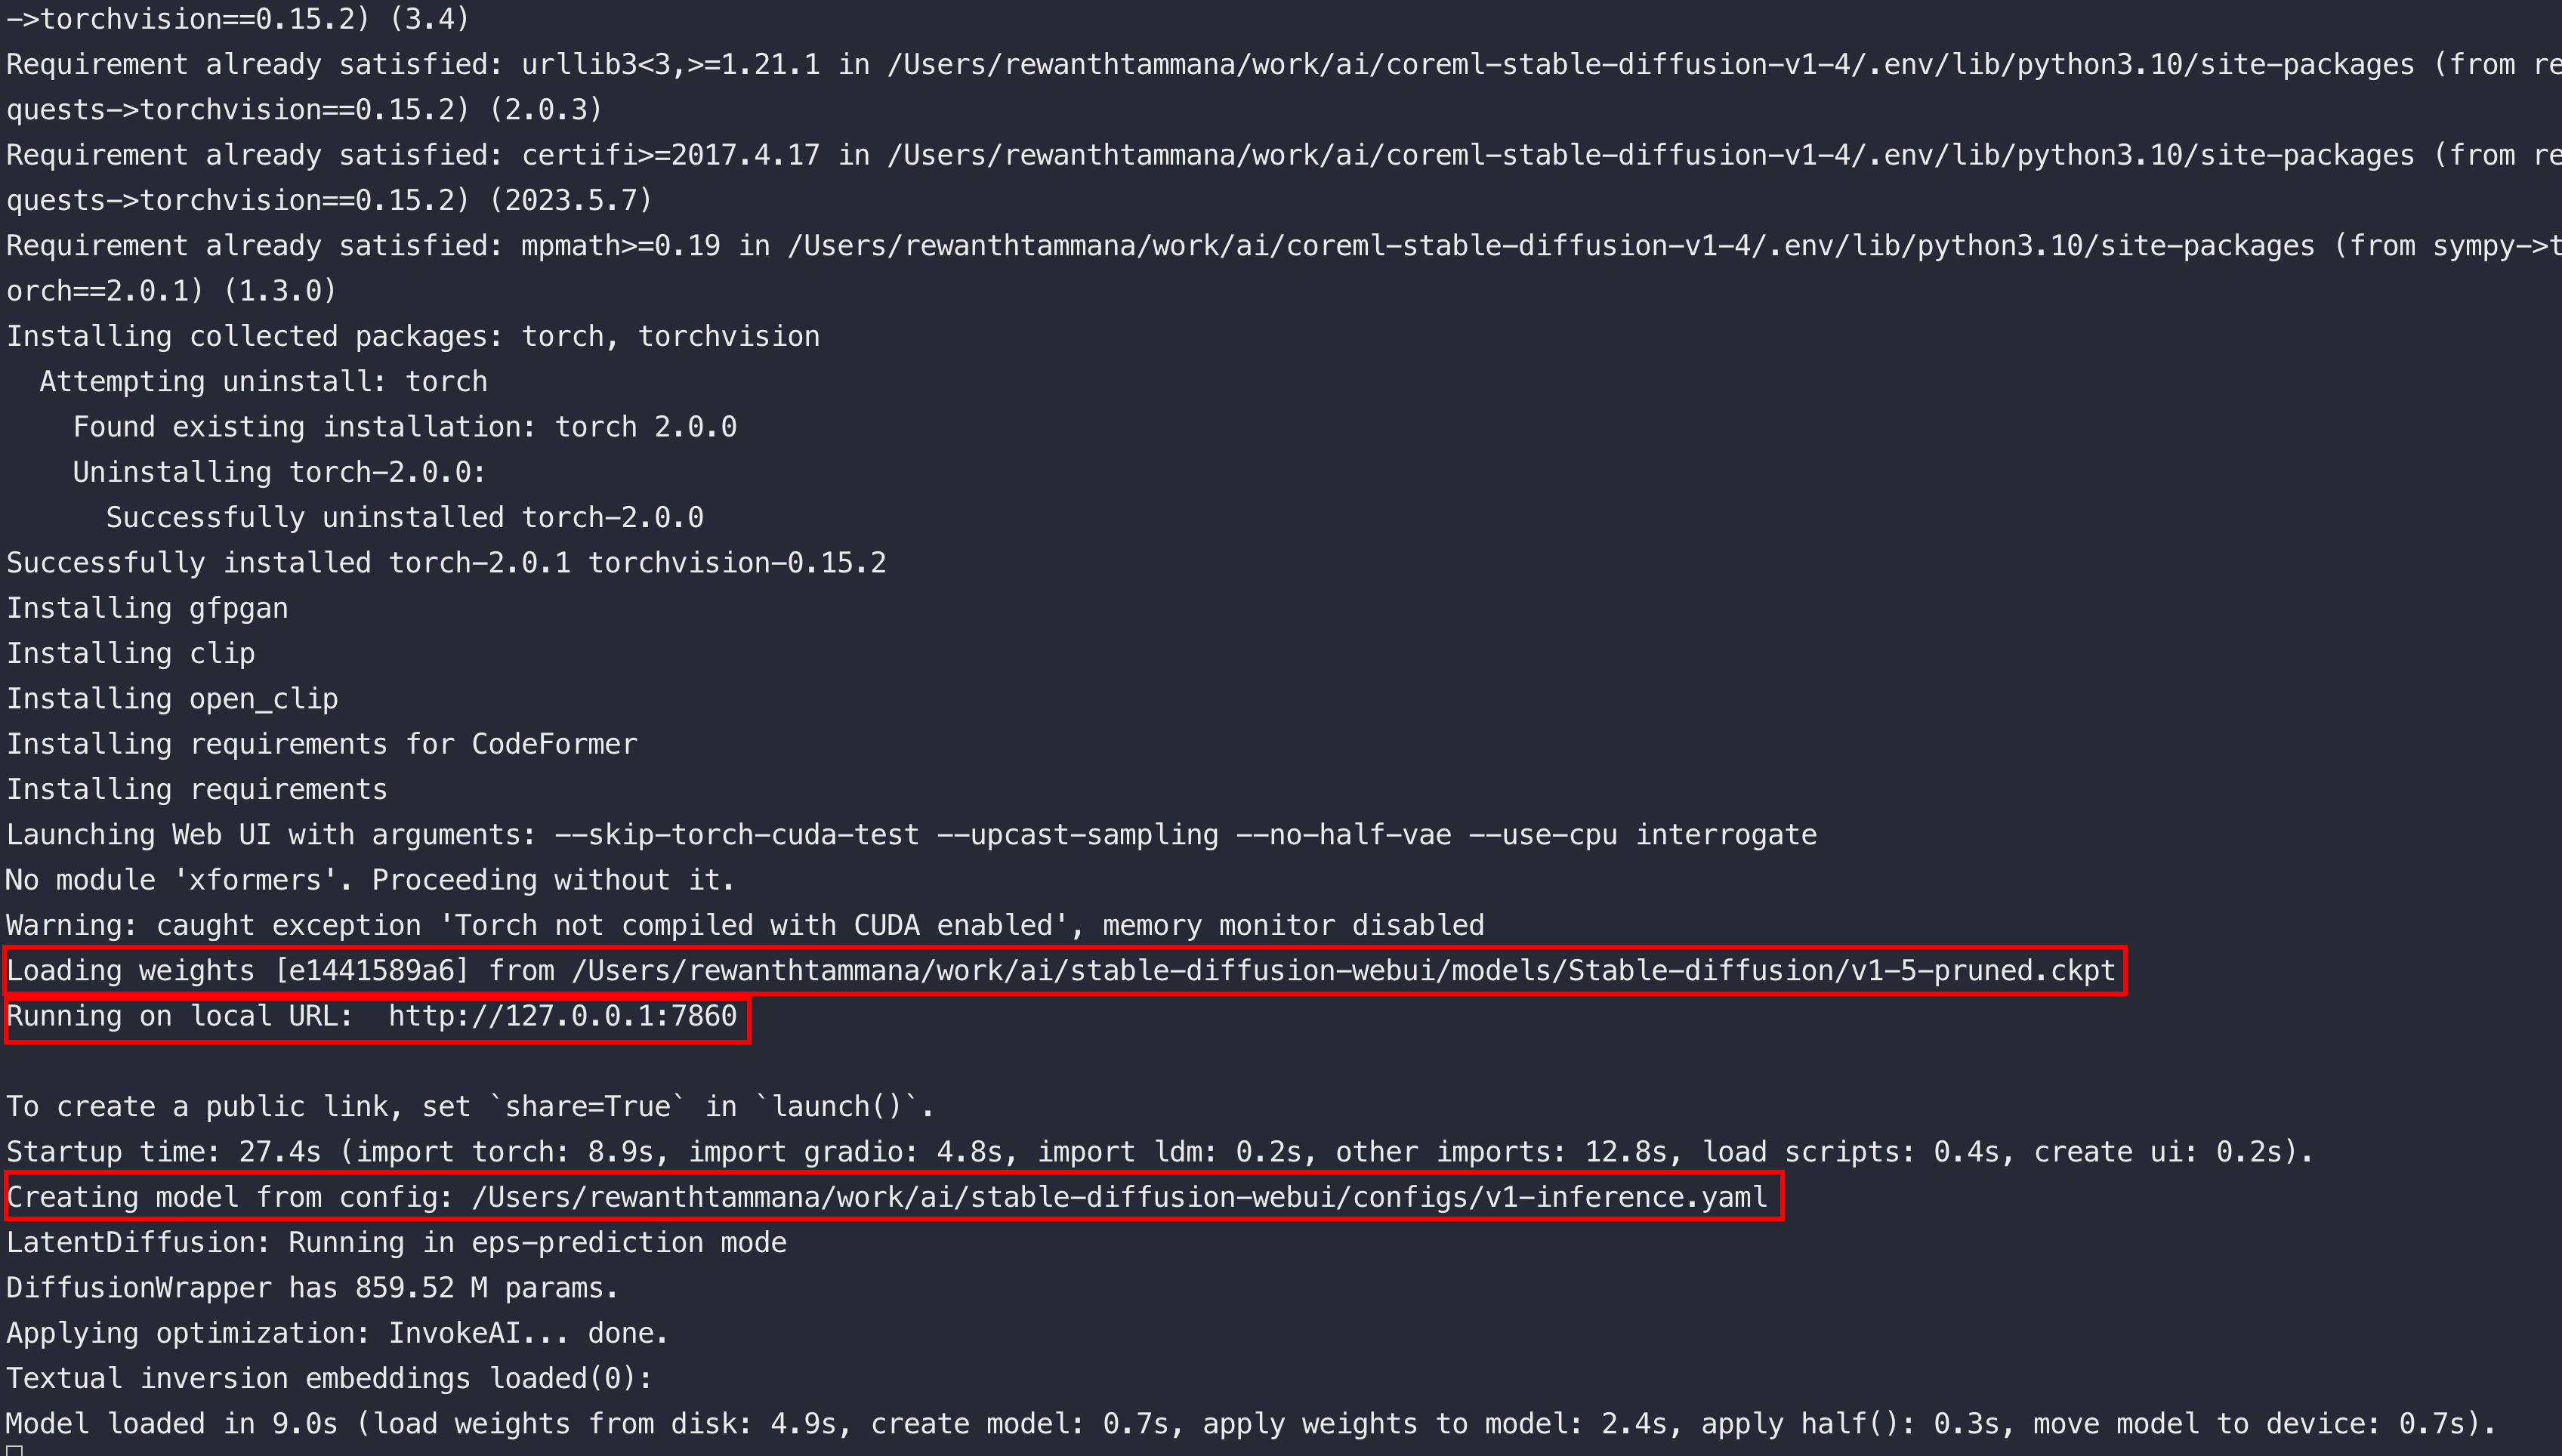
The default configuration is in
configs/v1-inference.yaml. We don't have to change them in this blog, showing the contents for reference. Feel free to modify them & play around.model: base_learning_rate: 1.0e-04 target: ldm.models.diffusion.ddpm.LatentDiffusion params: linear_start: 0.00085 linear_end: 0.0120 num_timesteps_cond: 1 log_every_t: 200 timesteps: 1000 first_stage_key: "jpg" cond_stage_key: "txt" image_size: 64 channels: 4 cond_stage_trainable: false # Note: different from the one we trained before conditioning_key: crossattn monitor: val/loss_simple_ema scale_factor: 0.18215 use_ema: False scheduler_config: # 10000 warmup steps target: ldm.lr_scheduler.LambdaLinearScheduler params: warm_up_steps: [ 10000 ] cycle_lengths: [ 10000000000000 ] # incredibly large number to prevent corner cases f_start: [ 1.e-6 ] f_max: [ 1. ] f_min: [ 1. ] unet_config: target: ldm.modules.diffusionmodules.openaimodel.UNetModel params: image_size: 32 # unused in_channels: 4 out_channels: 4 model_channels: 320 attention_resolutions: [ 4, 2, 1 ] num_res_blocks: 2 channel_mult: [ 1, 2, 4, 4 ] num_heads: 8 use_spatial_transformer: True transformer_depth: 1 context_dim: 768 use_checkpoint: True legacy: False first_stage_config: target: ldm.models.autoencoder.AutoencoderKL params: embed_dim: 4 monitor: val/rec_loss ddconfig: double_z: true z_channels: 4 resolution: 256 in_channels: 3 out_ch: 3 ch: 128 ch_mult: - 1 - 2 - 4 - 4 num_res_blocks: 2 attn_resolutions: [] dropout: 0.0 lossconfig: target: torch.nn.Identity cond_stage_config: target: ldm.modules.encoders.modules.FrozenCLIPEmbedderLet's access the application in a web browser, http://127.0.0.1:7860/
I've given a prompt,
astronaut eating food& below is the generated image.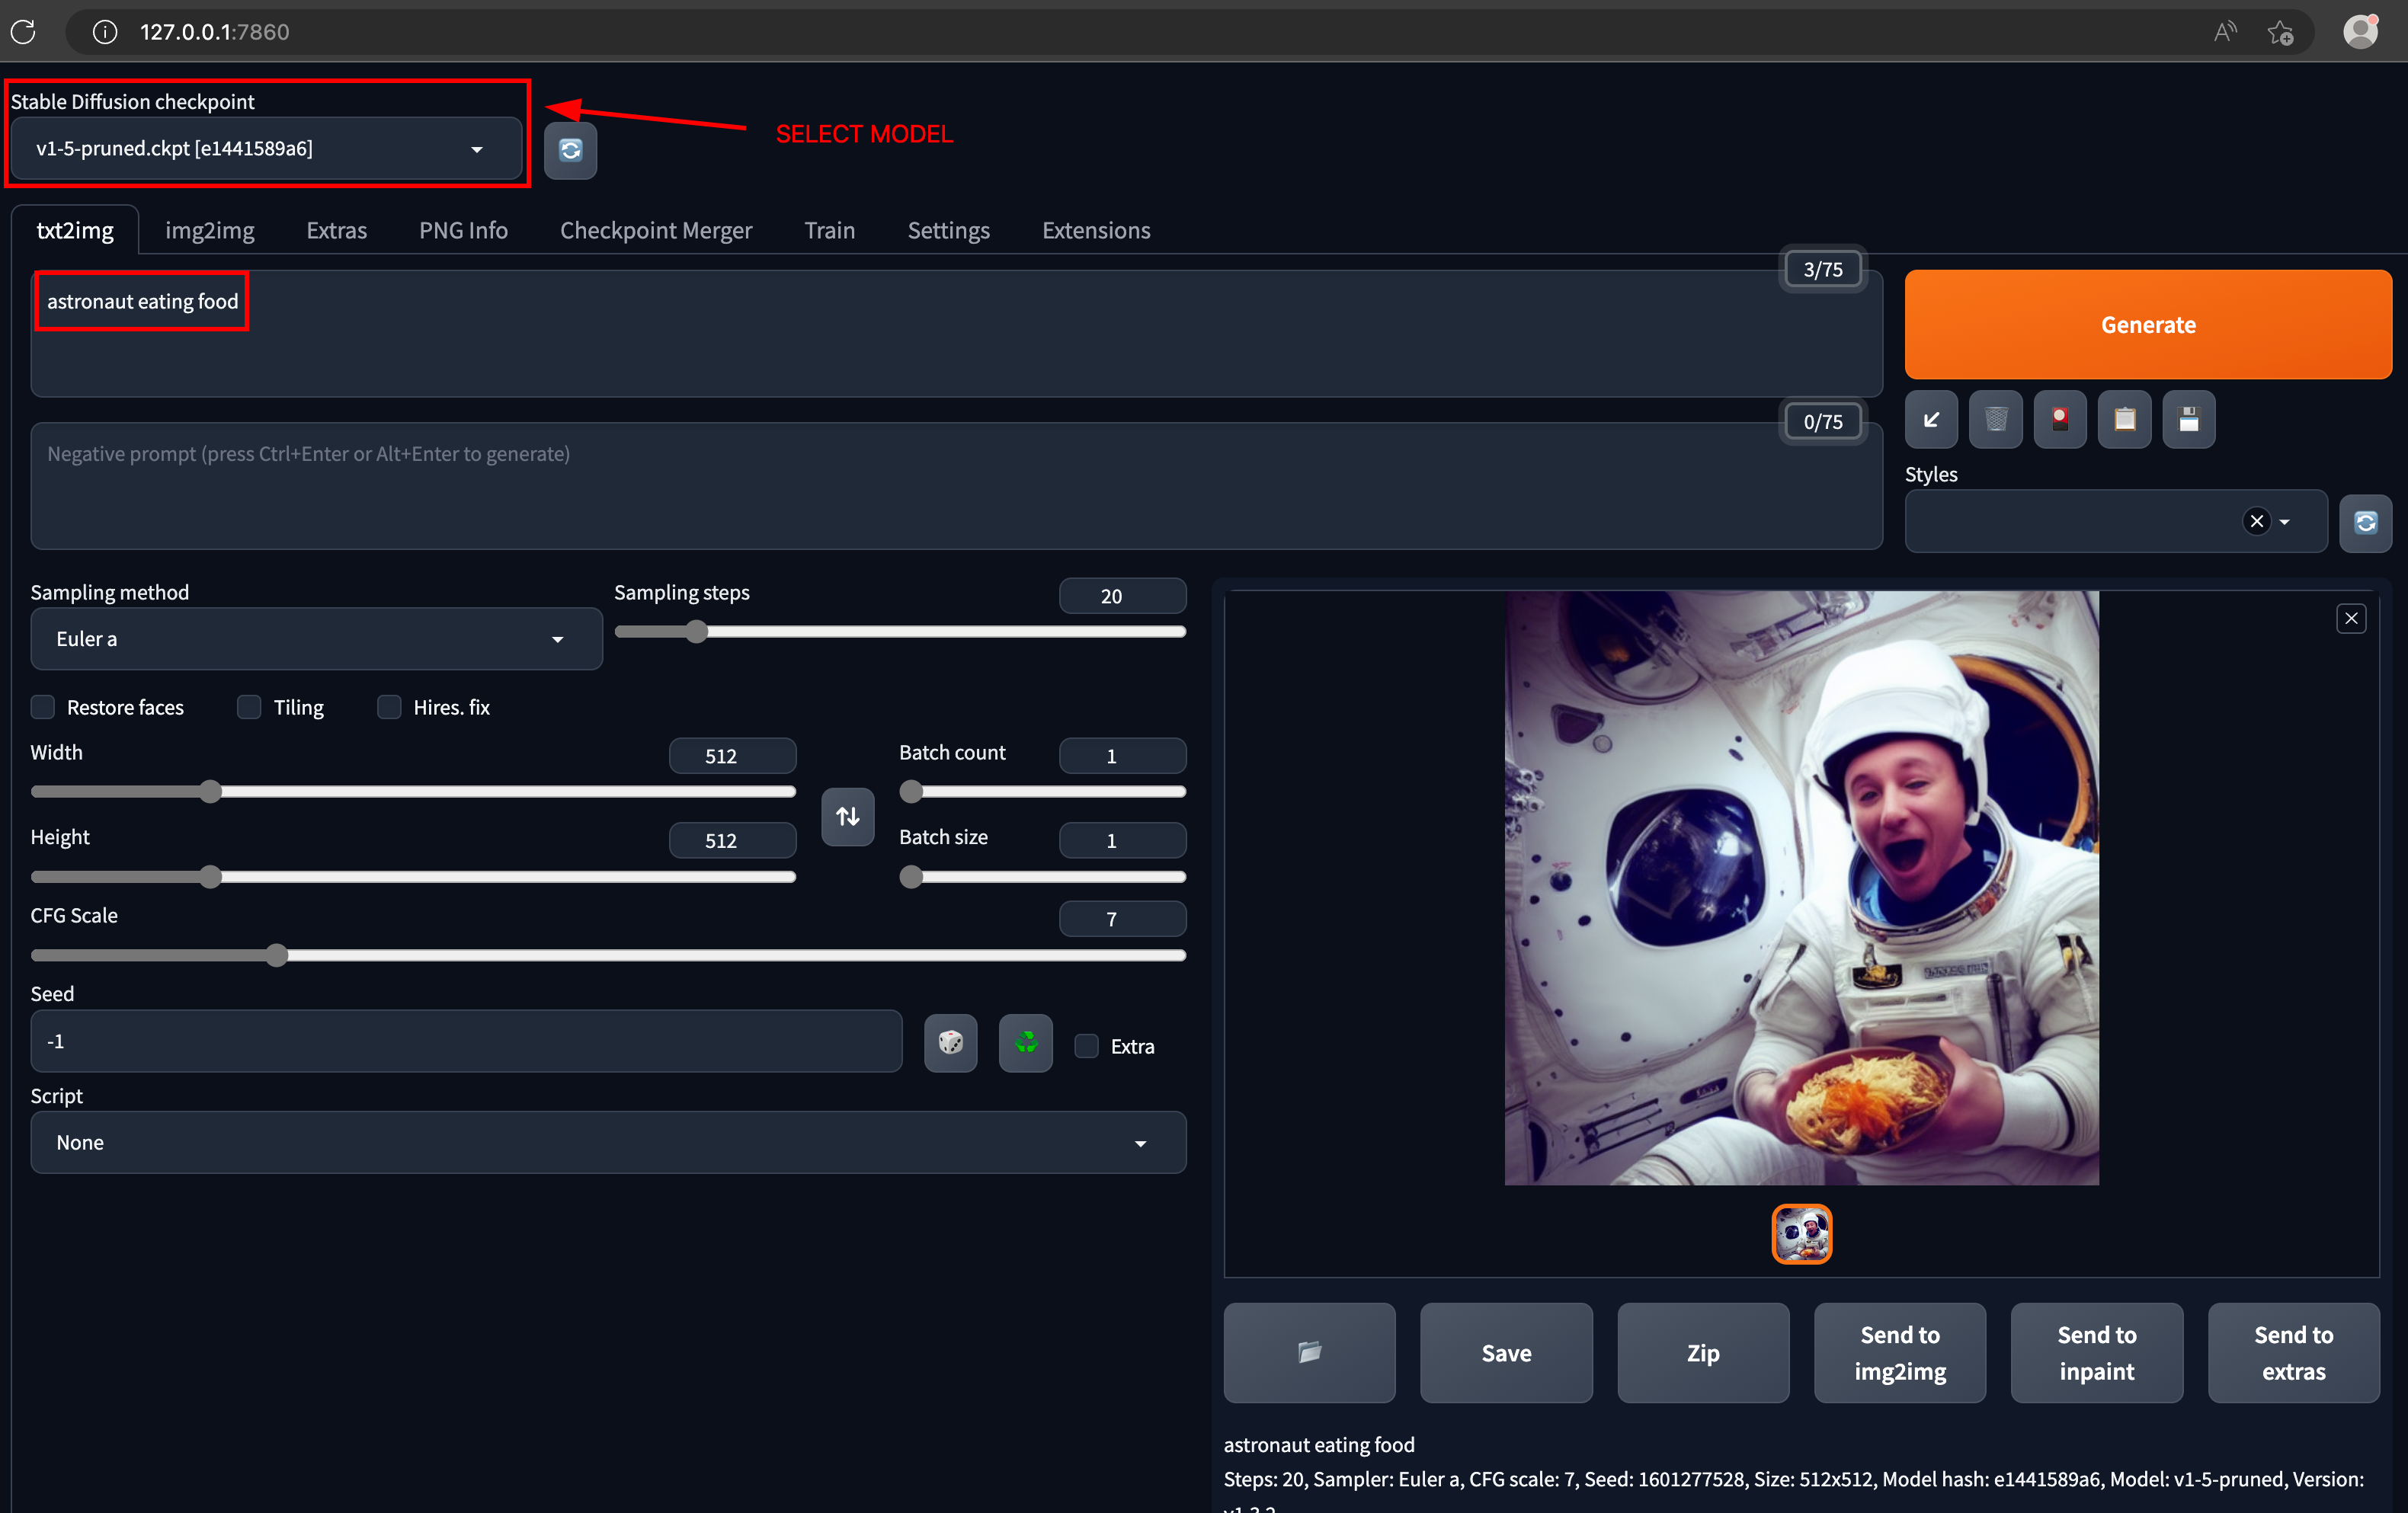
Increasing the batch size will generate multiple images & there are numerous other configurable variables.
Demystifying AI Image Generation
You may be wondering how the model creates these images from text prompts. The Stable Diffusion Web UI provides an "interrogate clip" feature to demystify this process. This tool allows you to probe how a model interprets an image, and you can then modify the generated interpretation to create new images.
The below image got generated with a prompt, astronaut sitting on a horse. I loaded the generated image in the img2img feature and clicked the interrogate button.
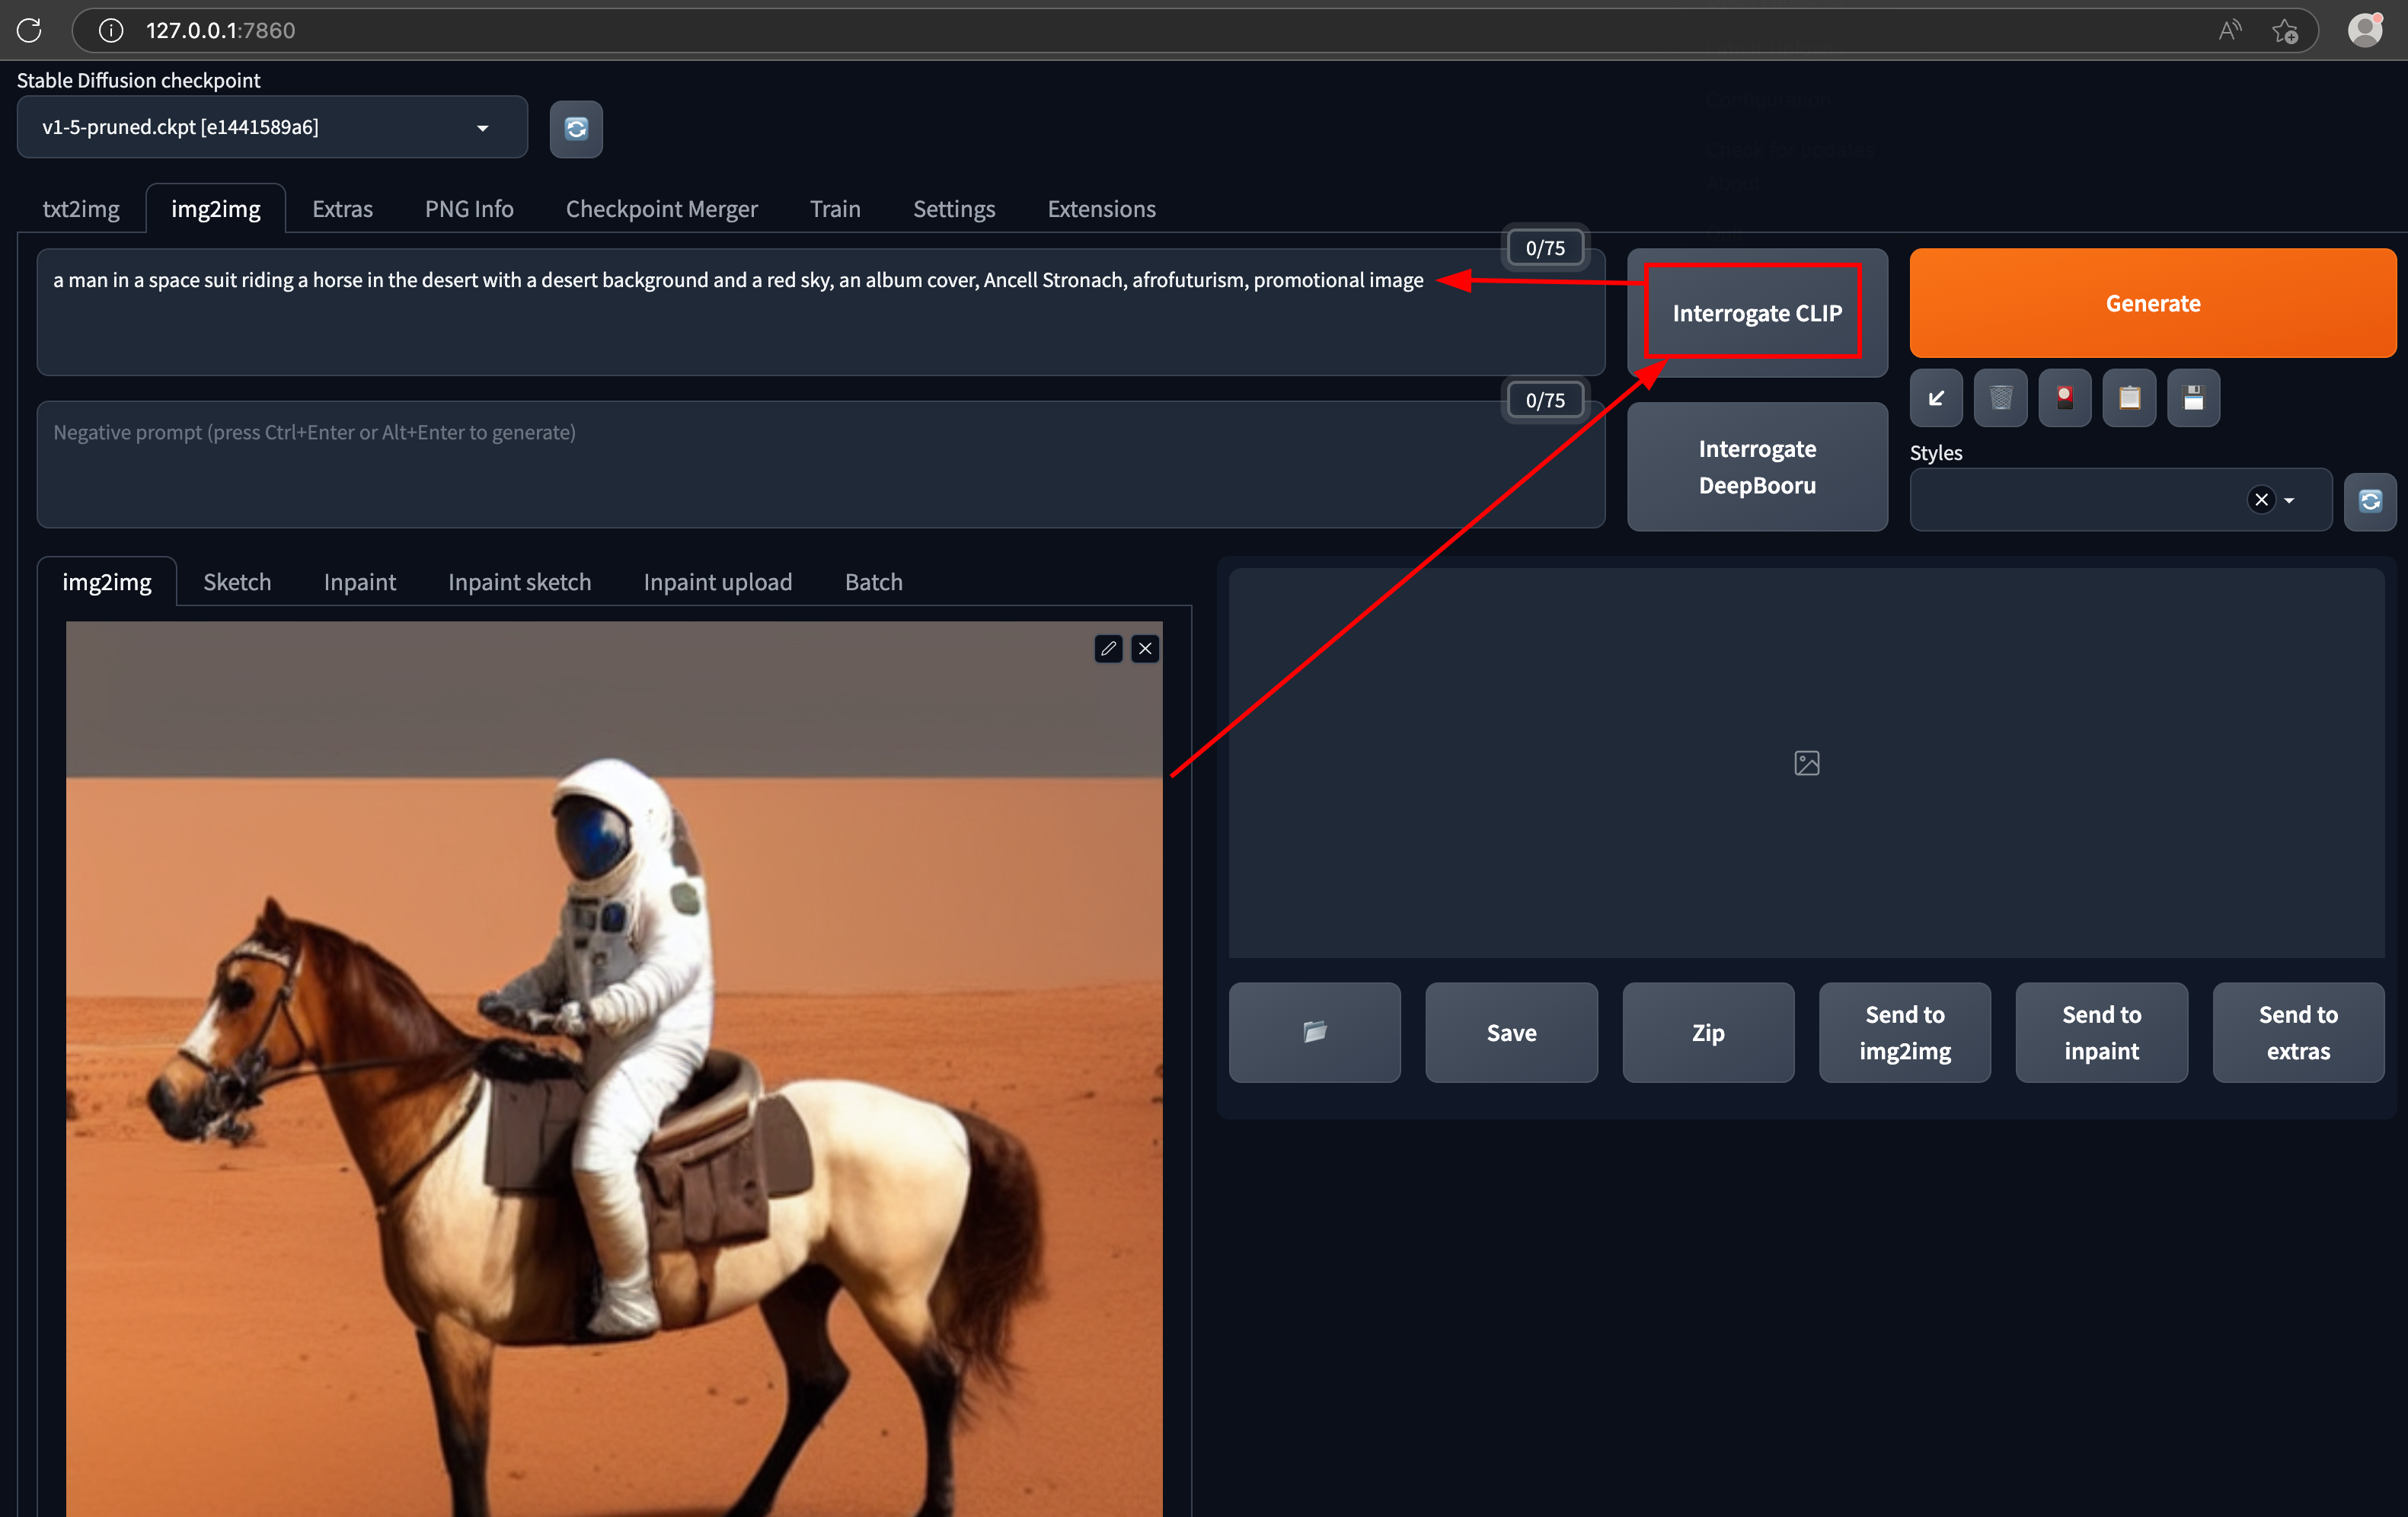
Now, we know what kind of prompt generates this image. For instance, the output generated by the "interrogate clip" interprets a component of the given picture as a red sky. Let's change that to "blue sky" and regenerate the image.

Tweaking the parameters of an image is fun. Let's try changing the "astronaut" to a man in "tuxedo" & see what it generates.
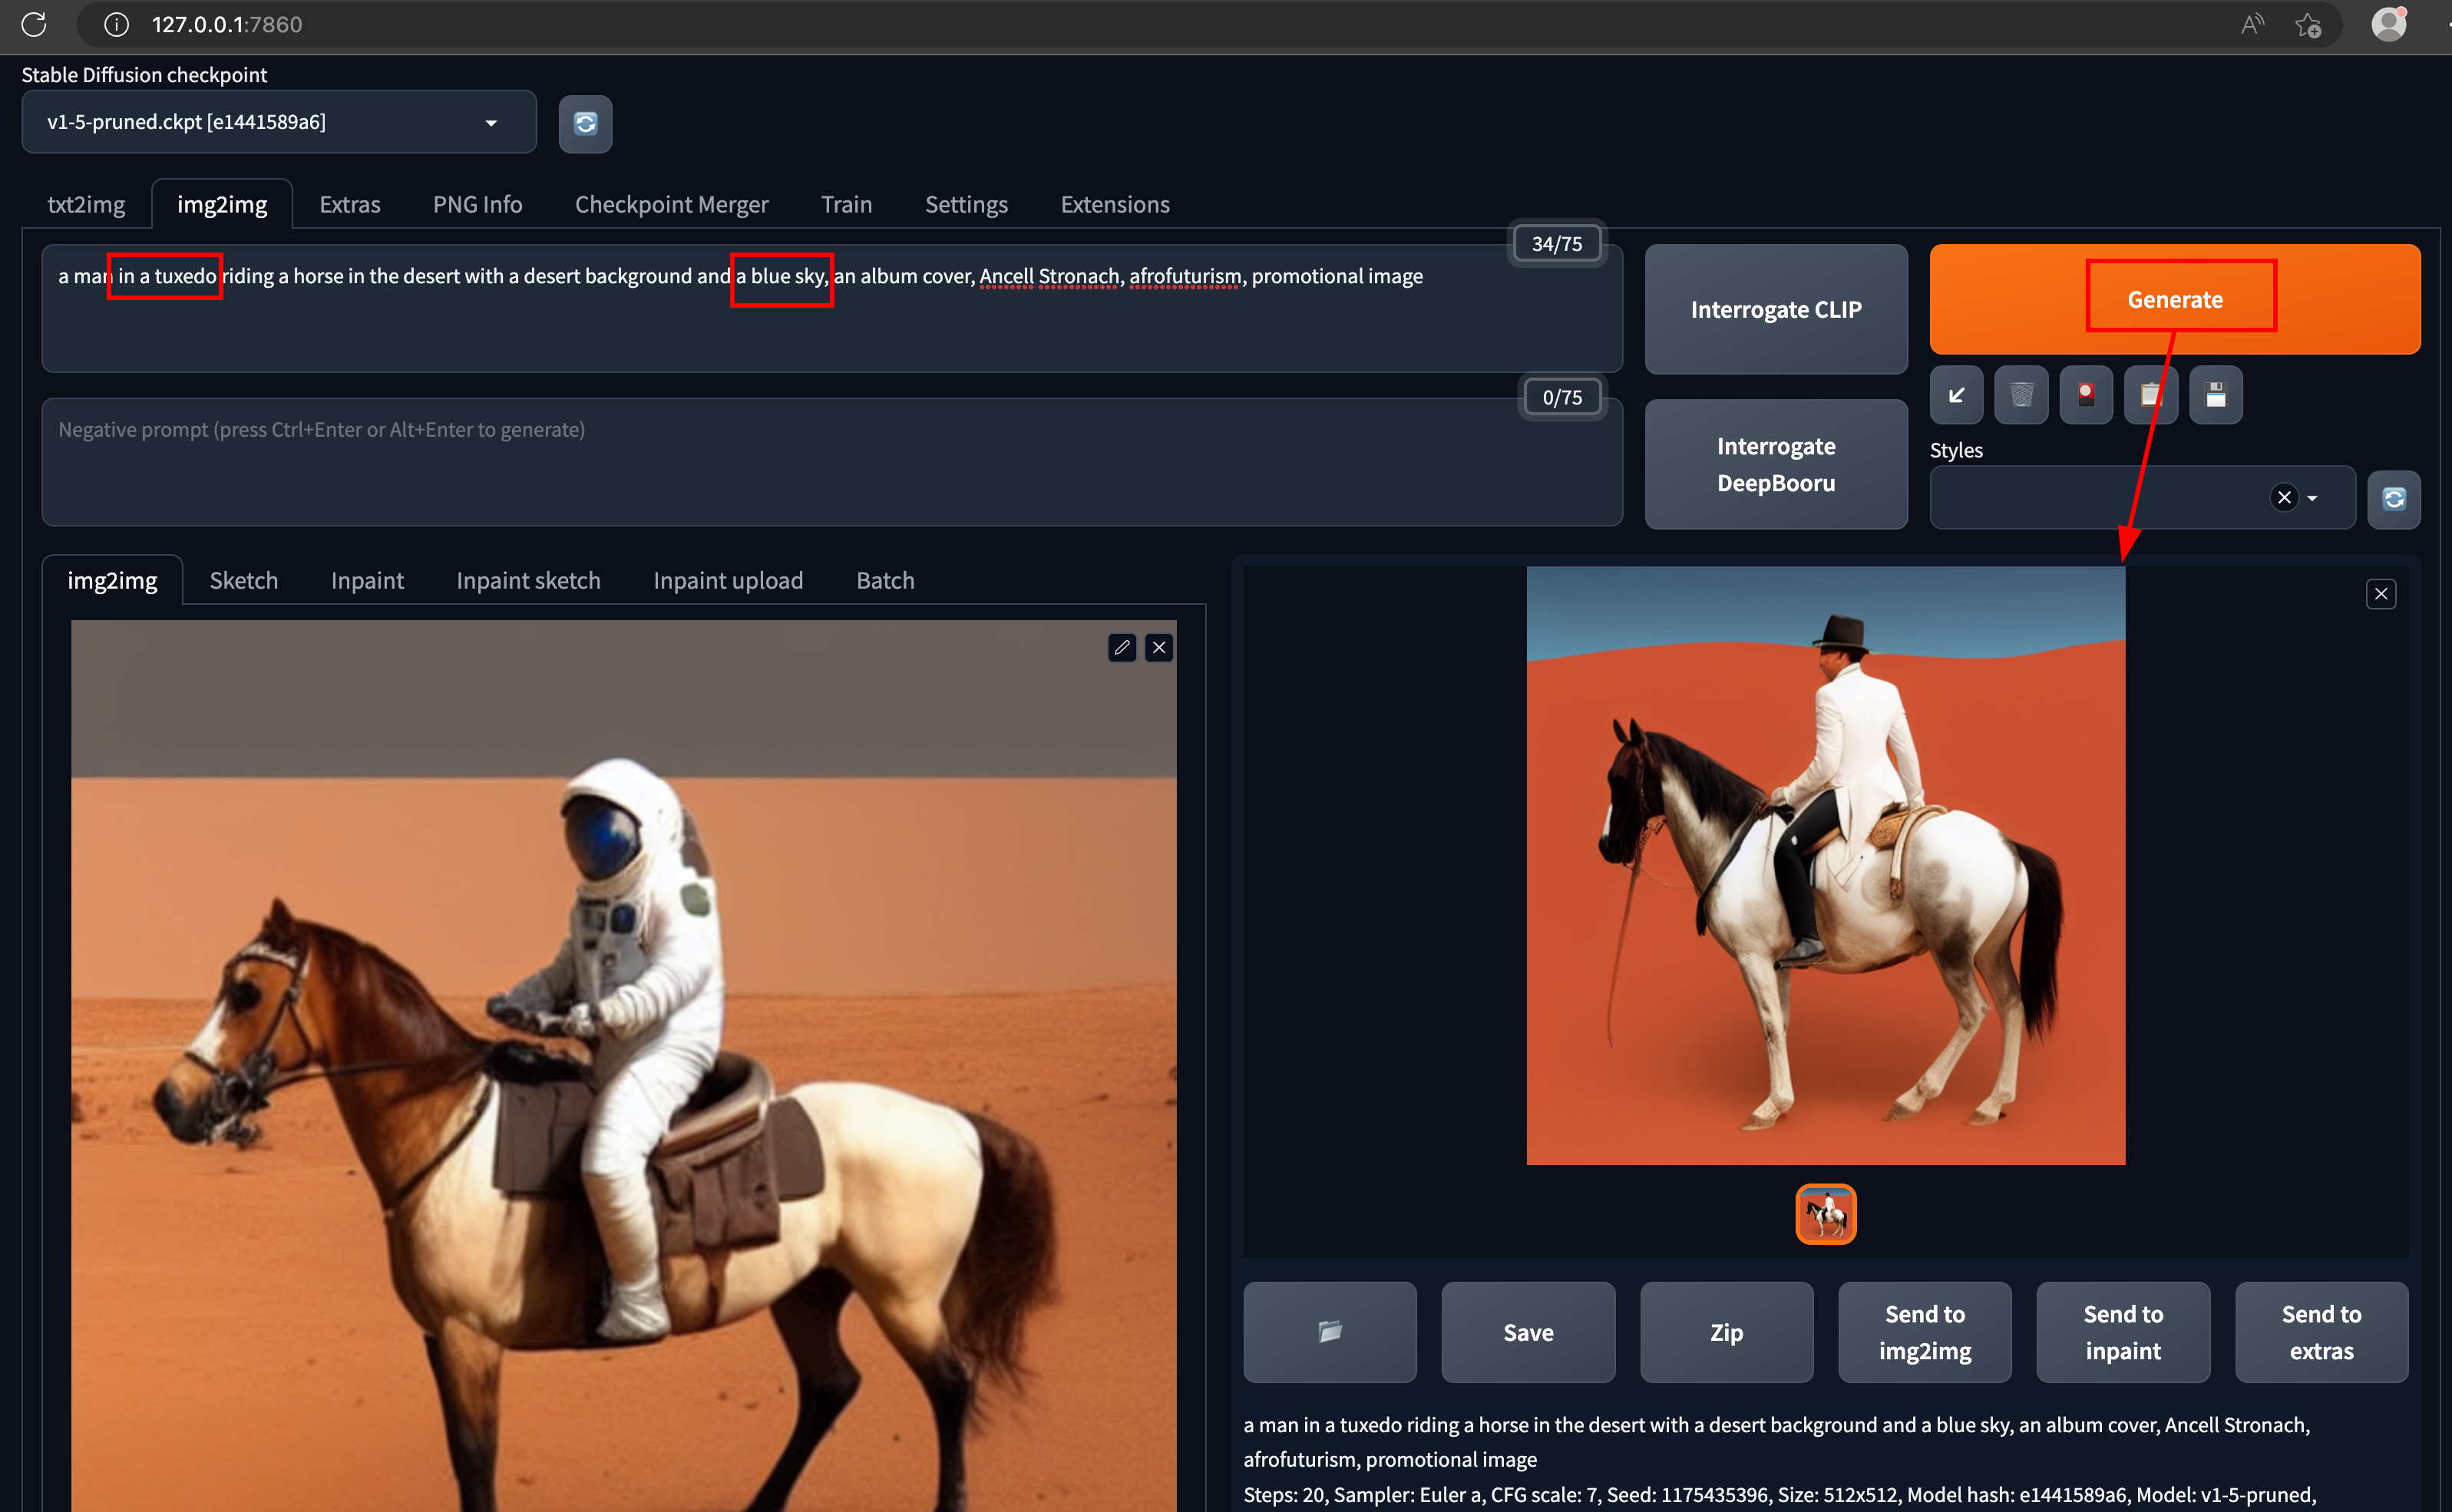
The above process helps to decode & understand how a model interprets a given image in text format & helps us to write appropriate prompts to generate desired pictures.
Going Beyond Images: Code Generation with AI
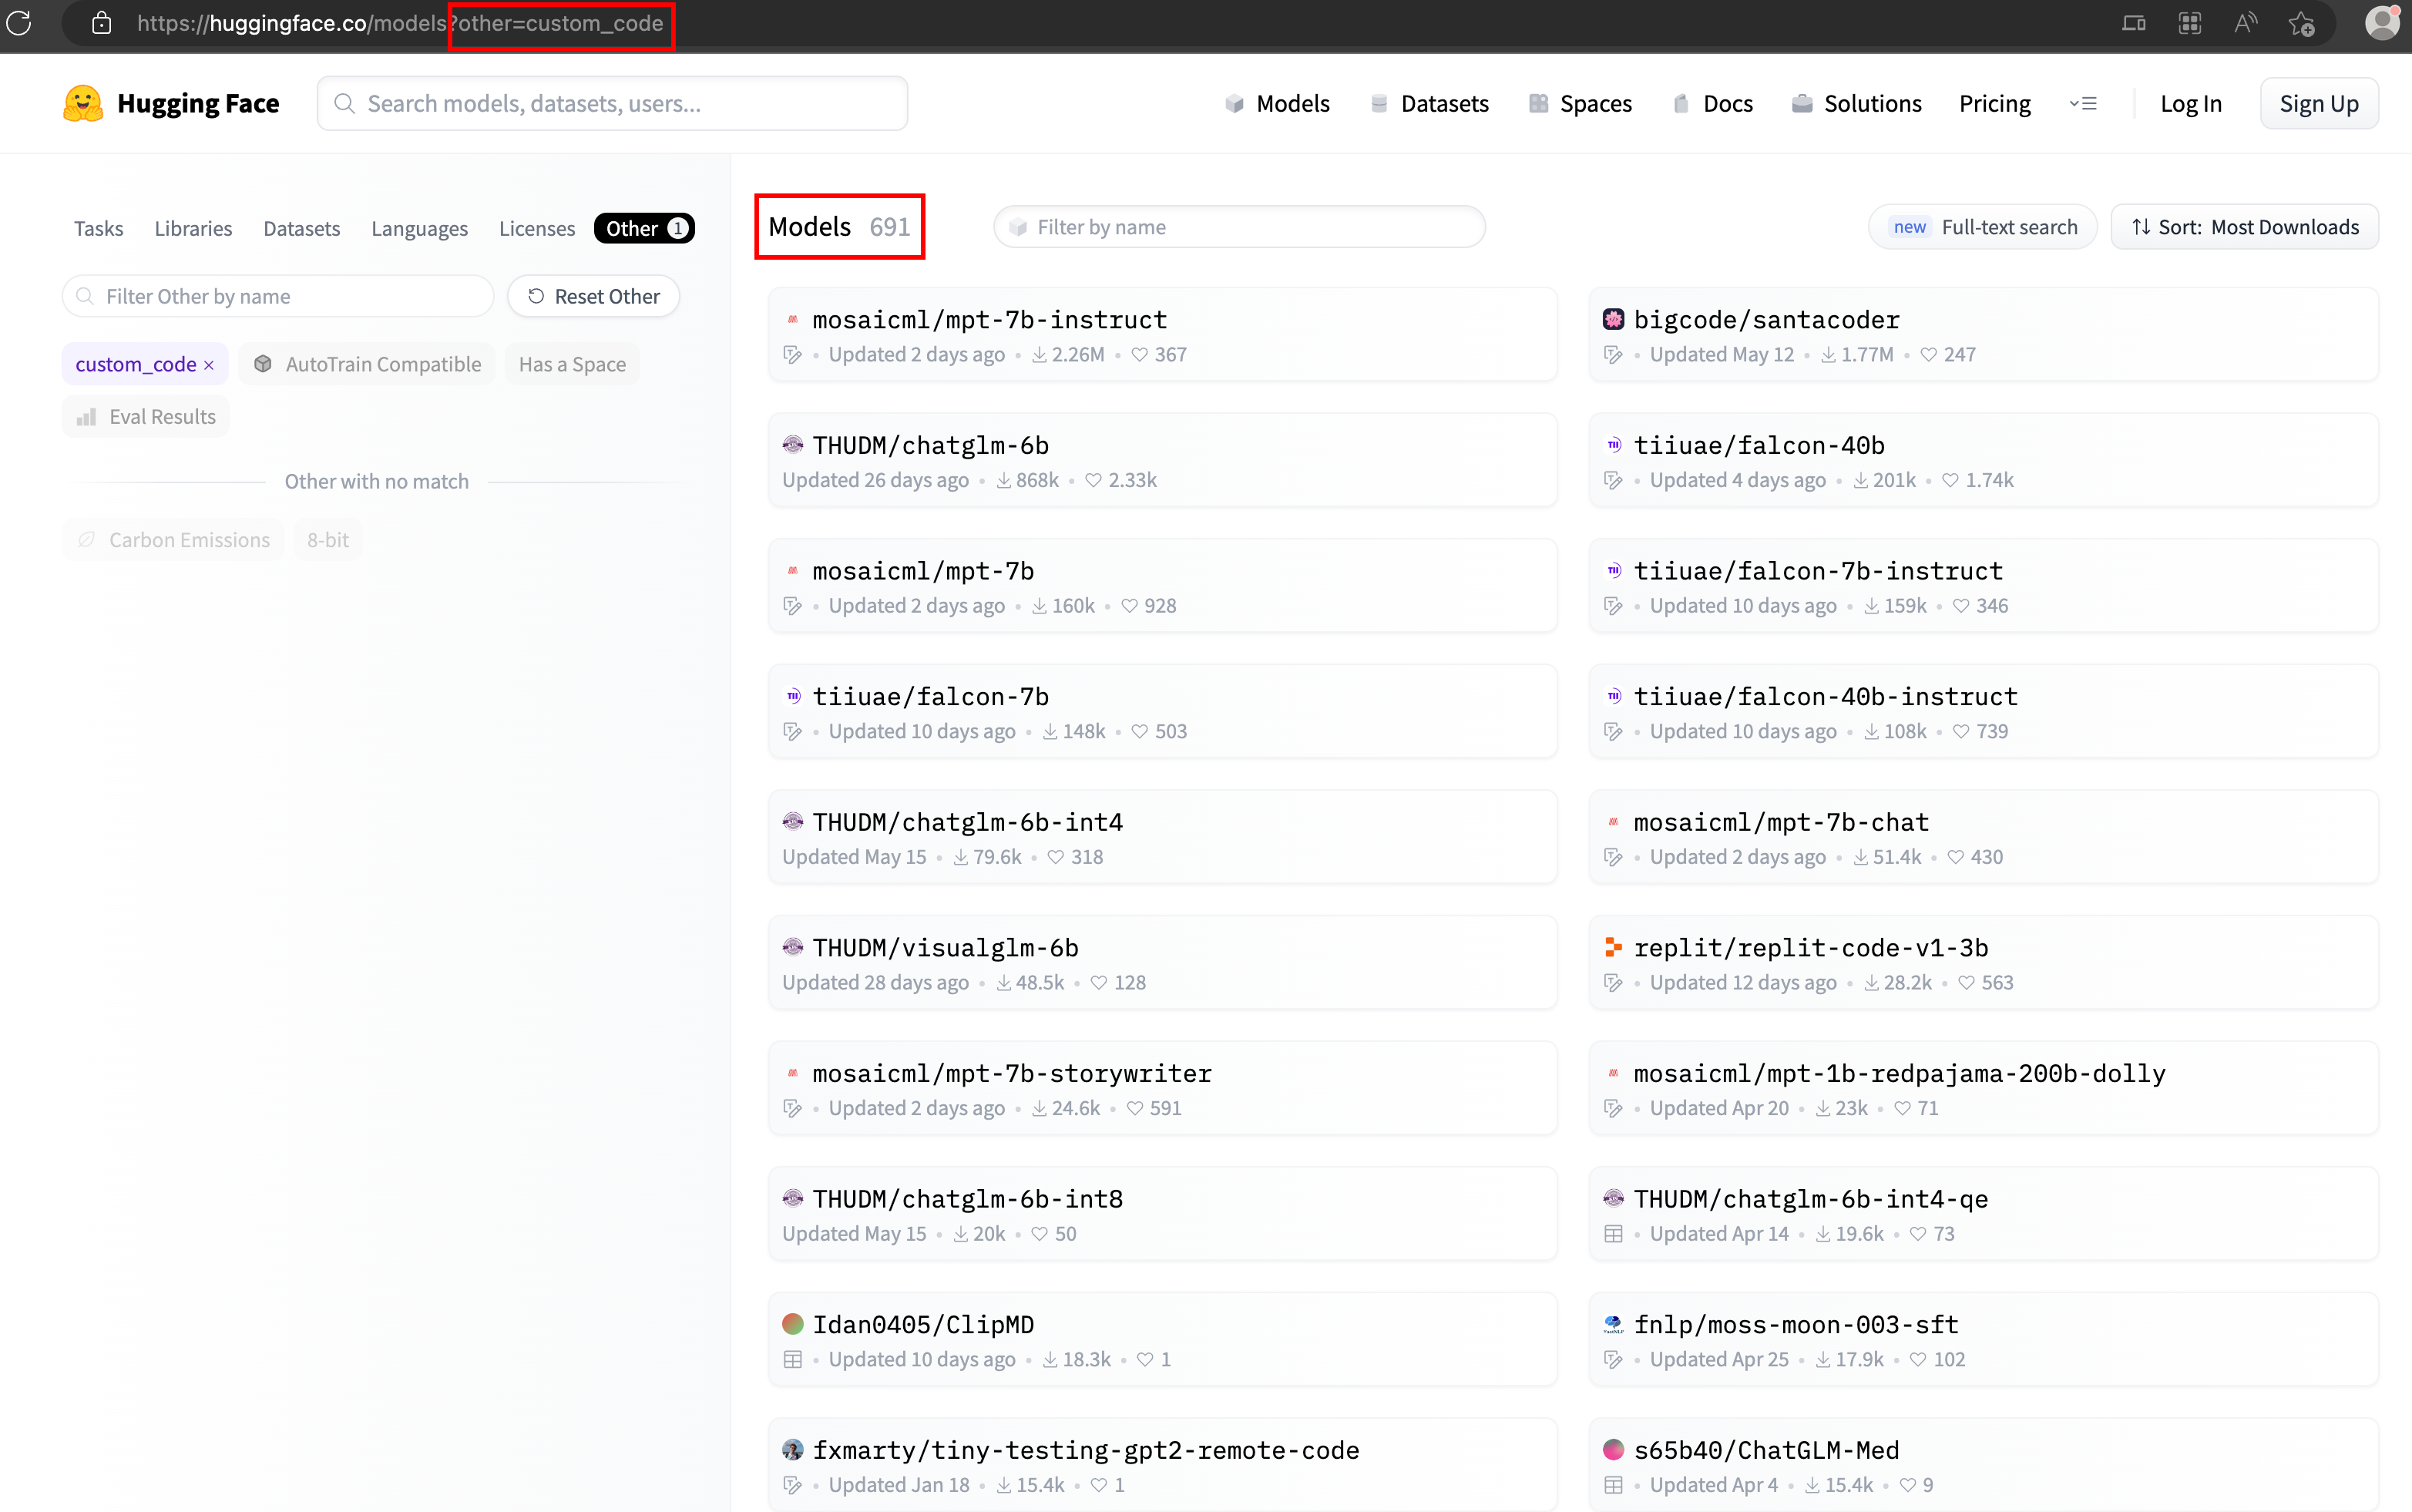
While image generation is exciting, what about code generation? On Hugging Face, a separate category called custom_code offers models for generating and interpreting custom code. One such model is bigcode/santacoder, which auto-fills Python code similarly to GitHub Copilot but operates locally.
# pip install -q transformers
from transformers import AutoModelForCausalLM, AutoTokenizer

checkpoint = "bigcode/santacoder"
device = "cuda" # for GPU usage or "cpu" for CPU usage

tokenizer = AutoTokenizer.from_pretrained(checkpoint)
model = AutoModelForCausalLM.from_pretrained(checkpoint, trust_remote_code=True).to(device)

inputs = tokenizer.encode("def print_hello_world():", return_tensors="pt").to(device)
outputs = model.generate(inputs)
print(tokenizer.decode(outputs[0]))
The generated output is as follows:
def print_hello_world():
    print("Hello World!")
The possibilities are endless
The exploration doesn't stop at code autofill. You'll find models that generate code from textual input, detect errors in your code, and even suggest security improvements.
Conclusion
This guide has highlighted the importance of data security in the AI landscape and the power of local AI execution. Leveraging AI is an integral part of technological evolution and workflow optimization. However, it's equally essential to maintain data security and privacy. Thus, running AI models on local systems provides an excellent solution to balance efficiency and data protection.
In an ever-evolving technological landscape, local AI execution using platforms like Hugging Face ensures we remain at the forefront of AI advancements while prioritizing data security. So, gear up and experiment with AI locally - the possibilities are endless!